Candy-making can seem like a lost art, but with the crystal candy recipe in hand, you’ll be able to create this sweet treat in no time! In this article, we’ll cover everything from the basic ingredients to step-by-step instructions, tips, and fun variations to spice up your candy-making. Whether you’re a seasoned pro or a total beginner, this guide will help you craft beautiful and delicious crystal candies that are perfect for any occasion. Let’s dive in and uncover the sweetness of making your own homemade crystal candies!
Introduction to Crystal Candy Recipe
What is Crystal Candy Recipe?
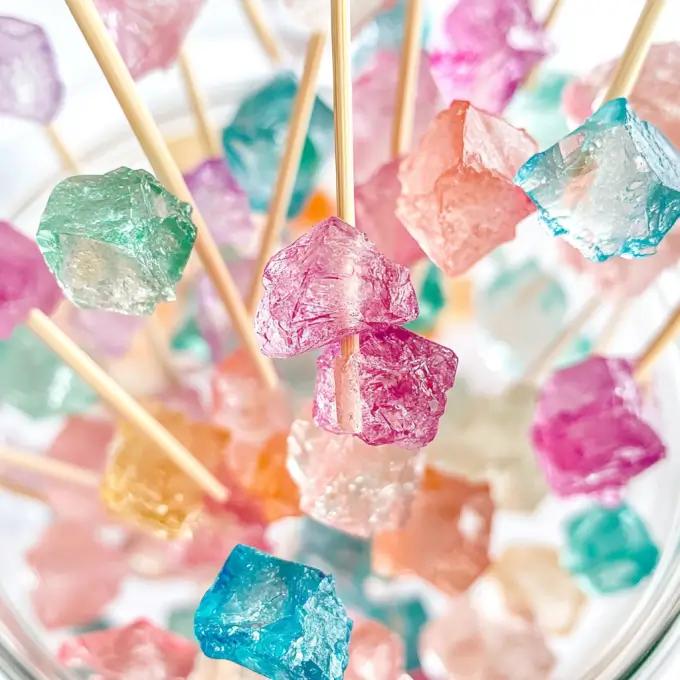
You might have seen these dazzling, sparkly candies at local fairs or in nostalgic movies, but what exactly is crystal candy? At its core, crystal candy (also known as rock candy) is made by crystallizing sugar. The process involves dissolving sugar in water and allowing it to crystallize over a period of time. The sugar forms long, beautiful crystals that grow and expand into a candy-like structure. While it sounds simple, creating the perfect crystal candy requires the right technique and a bit of patience.
This traditional candy has been enjoyed for centuries, and for good reason! The process is simple yet fascinating, and the end result is a visually stunning treat that can be customized in a variety of ways. Whether you enjoy it as a sweet snack or want to add a decorative touch to your baked goods, crystal candy recipe is a delightful and unique treat that’s fun to make and even more fun to eat.
Why You Should Make Crystal Candy Recipe at Home
Homemade crystal candy recipe offers a world of possibilities beyond what you’ll find at the store. Not only can you control the flavors, colors, and shapes, but you can also personalize your candies for any special occasion. Imagine giving a jar of vibrant, homemade rock candy as a gift – it’s a simple yet thoughtful gesture that’s sure to leave a lasting impression.
Additionally, making crystal candy recipe at home is a fantastic activity for family and friends. It’s easy to involve kids in the process (they’ll love watching the crystals grow!), and it’s a wonderful way to bond over a creative, hands-on project. So, if you’ve been looking for a fun kitchen experiment that combines science with sweetness, you’ve found it! Keep reading as we break down the ingredients and tools you’ll need for this sugar-filled adventure.
Ingredients for Crystal Candy Recipe
Essential Ingredients
When it comes to making a crystal candy recipe, the ingredients are fairly simple but essential for achieving those beautiful sugar crystals. To get started, you’ll need the following:
- Granulated Sugar: The primary ingredient for crystal candy recipe. The more sugar, the larger your crystals can grow. It’s important to use regular granulated sugar, as it dissolves easily in water and helps form those perfect, sparkling crystals.
- Water: You’ll need water to dissolve the sugar and form the syrup. The ratio of water to sugar is key, as too much water can result in smaller crystals, while too little can lead to crystallization that happens too quickly.
- Flavoring (Optional): This is where you can get creative. You can add a variety of flavors such as vanilla, lemon, or even peppermint. Just make sure to choose a flavor extract that is concentrated enough to stand up to the sweetness of the sugar.
- Food Coloring (Optional): If you want your crystal candy recipe to be visually appealing, a few drops of food coloring will do the trick. You can use one color or experiment with different hues for a more vibrant look. Choose gel food coloring for more concentrated color without altering the consistency of your candy.
In addition to these basic ingredients, you’ll also need wooden skewers or string to hang in the syrup, where the crystals will form. These serve as a “seed” to start the crystal formation.
Optional Add-ins and Variations
While the basic crystal candy recipe will yield a delicious treat, there are many ways you can elevate your candy-making experience. Some people like to add a pinch of salt for contrast or try infusing the syrup with herbs or spices. For example, a dash of cinnamon or a sprig of mint can add subtle, aromatic flavors to your candy.
In addition to flavorings and coloring, you can also play around with the shape of your crystals. While the typical long, rock candy formation is classic, you can experiment with molds for fun, themed shapes that make your crystal candy even more unique.
Tools You Need to Make Crystal Candy Recipe
Kitchen Equipment Needed
Making crystal candy recipe requires just a few tools, but each one is necessary for achieving the perfect outcome. Here’s what you’ll need:
- Large Pot: A heavy-bottomed pot is essential for dissolving the sugar. This ensures that the syrup heats evenly and doesn’t burn, allowing the sugar to fully dissolve.
- Candy Thermometer: A candy thermometer is your best friend in making crystal candy recipe. It will help you monitor the temperature of the syrup to ensure it’s hot enough to crystallize but not too hot that it burns or causes issues.
- Wooden Skewers or String: This is where your crystal candy recipe begins to take shape. The skewers or string act as a base where the sugar crystals can form and grow.
- Measuring Cups and Spoons: Precision is key, so using the right amounts of sugar and water is important for a successful recipe. Accurate measurements will help you control the crystallization process.
- Jars or Containers: Once the crystals begin to form, you’ll need something to suspend the skewers or string in. A tall glass jar or any container that can hold the syrup will work just fine.
Why These Tools Are Crucial
Each tool serves a specific function in ensuring the sugar dissolves properly, the crystals form at the right pace, and the final candy is a success. Without the right equipment, your crystal candy recipe might not work as intended. So, investing in a few kitchen essentials can make a huge difference in the final product.
Step-by-Step Crystal Candy Recipe

Preparing the Sugar Syrup
The first step in your crystal candy recipe is to prepare the sugar syrup. In a large pot, combine 2 cups of sugar with 1 cup of water. Stir the mixture over medium heat until the sugar completely dissolves. It’s important to not let the mixture come to a boil too quickly, as this can affect the crystallization process. Keep stirring until the syrup is clear and free of any sugar crystals.
Once dissolved, raise the temperature to medium-high heat and bring the syrup to a boil. You can use your candy thermometer to ensure the syrup reaches around 230°F (110°C). This is the ideal temperature to begin forming crystals.
Dissolving the Sugar and Adding Flavor
Once your syrup has reached the proper temperature, turn off the heat and allow the syrup to cool for a few minutes. After that, you can add your flavoring and color. A few drops of your chosen extract, like lemon or peppermint, should be enough to infuse the syrup with a nice aroma.
For the color, add a few drops of gel food coloring. Stir gently to incorporate the color evenly throughout the syrup. Be sure to use a food-safe coloring agent that won’t affect the sugar’s ability to crystallize.
Setting the Crystals
Next, pour the syrup into your jar or container. This is where the fun starts! Dip the skewers or strings into the syrup and then set them aside to cool for a few minutes. Before you place them in the syrup, coat them lightly with sugar to give the crystals something to grab onto.
After the syrup has cooled a bit, place the skewers or strings into the jar of syrup. Ensure the skewers don’t touch the sides or bottom of the jar, as this will affect the crystal growth. Allow the syrup to sit undisturbed for several hours, ideally in a cool, dry location. Over time, you’ll begin to see the crystals forming on the skewers.
Checking and Removing the Crystals
Patience is key when it comes to crystal candy. After 4-7 days, check the progress. You should see large, beautiful sugar crystals growing on the skewers. When they reach your desired size, carefully remove the skewers from the syrup and allow the candy to dry completely.
Your crystal candy recipe is now ready to enjoy! Whether you choose to eat it immediately or store it for later, this treat is bound to impress with its beautiful appearance and delightful taste.
Tips and Tricks for Perfect Crystal Candy Recipe

Troubleshooting Common Problems
Making crystal candy recipe is an exciting process, but it can sometimes come with challenges. Fortunately, there are easy ways to troubleshoot common issues:
- Crystals Not Forming Properly: If your crystal candy recipe isn’t growing as expected, the most likely cause is either the temperature of the syrup or the environment. Ensure the syrup reached the right temperature (230°F or 110°C) and that it cooled to room temperature before being placed in the jar. Additionally, make sure the location where you’re storing the syrup is cool and dry, as too much heat or humidity can disrupt the crystallization process.
- Crystals are Too Small or Weak: If the crystals are tiny or fragile, it could be because there was too much water in the syrup, or the sugar wasn’t fully dissolved. In such cases, try increasing the sugar-to-water ratio or ensuring that the sugar has completely dissolved before boiling. You can also coat your skewers with extra sugar before dipping them into the syrup to provide more “seeds” for crystal growth.
- Sticky Crystals: Occasionally, your crystal candy recipe might end up a bit sticky. This usually happens if the syrup was too hot when poured into the container. To avoid this, make sure the syrup cools a bit before you pour it into your jar, allowing the sugar to set more efficiently.
How to Enhance the Look of Your Crystal Candies
The visual appeal of crystal candy recipe is one of its biggest draws, and you can easily enhance its look with a few simple tricks. Adding glittery sugar crystals to the surface or using colored food gel can turn your candies into eye-catching works of art. You can also experiment with different shapes by using molds to create fun, themed candy pieces.
If you want your crystal candy to shine even brighter, consider displaying it in jars or clear containers that show off the beautiful sugar formations. These candies make for fantastic gifts, especially when paired with custom labels or personalized jars!
Creative Variations of Crystal Candy Recipe
Flavored Crystal Candies
While the classic crystal candy recipe is delightful on its own, there’s plenty of room to get creative. Flavored crystal candy recipe can add a unique twist to your treat. Try infusing the syrup with different extracts like vanilla, lemon, lavender, or even cinnamon for a spicy touch. These flavors will add an aromatic depth to your candy, making each bite even more exciting.
For something extra refreshing, experiment with mint, ginger, or berry extracts. If you’re feeling adventurous, you could even create a mixed-flavor crystal candy recipe by layering different flavored syrups in the same jar. The result is a multi-colored, multi-flavored treat that’s as fun to make as it is to eat.
Crystal Candy Recipe for Different Occasions
Why not take your crystal candy game to the next level and make it seasonal? For holidays like Christmas, you can make red and green crystal candy, perfect for adding a festive touch to your holiday table. For weddings or birthdays, customize the color and flavor to match the theme of the celebration.
In addition, crystal candies make great party favors. Simply package them in small jars or pretty bags, and you’ve got a thoughtful, sweet gift that your guests will love.
Frequently Asked Questions (FAQ)
What Is the Best Sugar for Making Crystal Candy?
For the best crystal candy recipe, it’s crucial to use granulated sugar. This sugar dissolves well in water and is ideal for crystallization. Avoid using powdered sugar or brown sugar, as they contain additional ingredients that could interfere with the crystallization process.
How Long Does It Take for Crystal Candy to Form?
The process of making crystal candy can take several days. Typically, it takes 4-7 days for the sugar crystals to grow to a good size, depending on the temperature and humidity of your environment. Therefore, patience is key! The crystals will continue to grow over this period, so it’s important to let them sit undisturbed.
Can I Make Crystal Candy Recipe Without Using Food Coloring?
Yes, absolutely! Crystal candy can be made without food coloring, and it will still be just as delicious. The natural color of the sugar crystals is beautiful on its own, or you can experiment with other ways to make the candy look appealing, like using flavored extracts that provide a natural tint.
How Do I Store My Homemade Crystal Candies?
Once your crystal candy has formed and dried, store it in an airtight container. To preserve the candy’s crystal shape and texture, make sure it’s kept in a dry place, away from humidity. You can also wrap the candies individually in wax paper to help prevent them from sticking together.
For more delicious recipes, check out our article on Delicious Muffin Top for another fun treat you can try at home!