When I first decided to make a Hello Kitty cake for my niece’s birthday, I was both excited and a bit overwhelmed. The first step was gathering all the necessary ingredients and tools. I made a list, which included flour, sugar, eggs, butter, baking powder, vanilla extract, and of course, the essential fondant in white and black for Hello Kitty’s iconic features.
I also picked up some pink food coloring to give the cake that signature touch. I remember standing in the baking aisle of my local grocery store, feeling like a kid in a candy store as I selected sprinkles and edible glitter to add some sparkle to my creation. In addition to the ingredients, I knew I needed the right tools to bring my vision to life.
A good set of mixing bowls, measuring cups, and a whisk were essential, but I also made sure to grab a cake leveler and a fondant rolling pin. I even invested in a Hello Kitty cake pan, which I found online after some extensive searching. It felt like a small victory when it arrived at my doorstep, and I couldn’t wait to get started.
Having everything ready before diving into the baking process made me feel more organized and less stressed.
Key Takeaways
- Gather all the necessary ingredients and tools before starting the cake-making process.
- Follow the step-by-step guide to prepare the cake batter and frosting for the Hello Kitty cake.
- Carefully shape and assemble the cake to create the iconic Hello Kitty shape.
- Use the guide to decorate the cake with Hello Kitty features such as the bow, eyes, and whiskers.
- Add the final touches to the cake to make it look professional and ready to serve and enjoy.
Preparing the Cake Batter and Frosting
Hello Kitty Cake Recipe
Ingredients
- 2 ½ cups all-purpose flour
- 2 tsp baking powder
- 1 cup unsalted butter softened
- 1 ¾ cups granulated sugar
- 4 eggs
- 1 tbsp vanilla extract
- 1 cup milk
- Pink food coloring
- White & black fondant
- Edible glitter and sprinkles optional
- Frosting:
- 1 cup unsalted butter
- 3 –4 cups powdered sugar
- 1 tsp vanilla extract
- Pink food coloring optional
Instructions
- Preheat oven to 350°F (175°C). Grease and flour Hello Kitty cake pan.
- In a bowl, whisk flour and baking powder. In another, cream butter and sugar.
- Add eggs one at a time, then mix in vanilla. Alternate adding flour and milk.
- Pour into the cake pan and bake for 30 minutes or until a toothpick comes out clean.
- Cool completely before removing from the pan.
- For frosting: Beat butter until fluffy, gradually add powdered sugar and vanilla. Add pink food coloring as desired.
- Level cake layers, assemble with frosting, and apply a crumb coat.
- Roll and cut fondant to create Hello Kitty features: eyes, bow, whiskers.
- Decorate cake and add final touches like glitter and piped rosettes.
Notes
With my ingredients and tools in place, it was time to whip up the cake batter. I opted for a classic vanilla sponge cake because it’s light and pairs well with various frostings. As I creamed the butter and sugar together, the sweet aroma filled my kitchen, instantly lifting my spirits.
I remember my grandmother’s advice about not rushing this step; it’s crucial for achieving that fluffy texture. After adding the eggs one by one and mixing in the dry ingredients, I poured the batter into my Hello Kitty-shaped pan with a sense of anticipation. While the cakes were baking, I turned my attention to the frosting.
I decided on a simple buttercream frosting, which is both delicious and easy to work with. As I whipped the butter and gradually added powdered sugar, I couldn’t help but taste-test along the way—after all, quality control is key! Once the frosting reached that perfect creamy consistency, I added a few drops of pink food coloring to match Hello Kitty’s signature bow.
The vibrant color brought a smile to my face as I imagined how beautiful it would look on the finished cake.
Shaping and Assembling the Cake

Once the cakes had cooled completely, it was time for the fun part: shaping and assembling! I carefully removed them from the pan, holding my breath as I flipped them over. To my relief, they came out perfectly!
Using a cake leveler, I trimmed off any uneven tops to ensure a smooth surface for stacking. As I placed one layer on my cake stand, I felt a rush of excitement; this was really happening! Next came the assembly.
I spread a generous layer of frosting between the two cake layers before placing the top layer on. It was crucial to ensure that everything was aligned properly since Hello Kitty’s face would be on display. After stacking them carefully, I applied a thin crumb coat of frosting around the entire cake to seal in any loose crumbs.
This step felt oddly satisfying as I smoothed out the frosting with an offset spatula. It was starting to look like an actual cake rather than just two layers of sponge!
Decorating the Cake with Hello Kitty Features

| Metrics | Data |
|---|---|
| Cake Size | 10 inches |
| Number of Hello Kitty Features | 5 |
| Time Taken to Decorate | 1 hour |
| Ingredients Used | Flour, Sugar, Butter, Eggs, Fondant |
| Cost of Decorations | 20 |
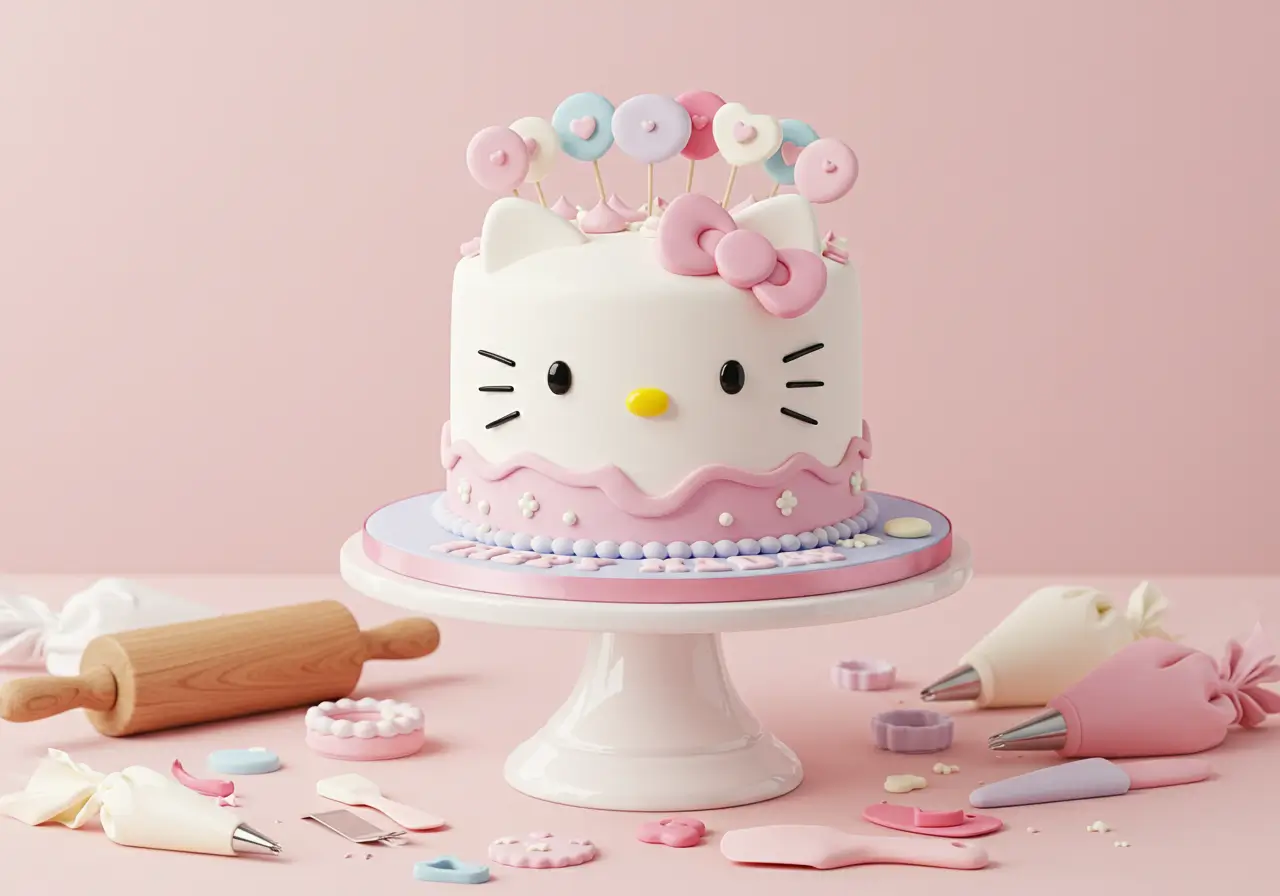
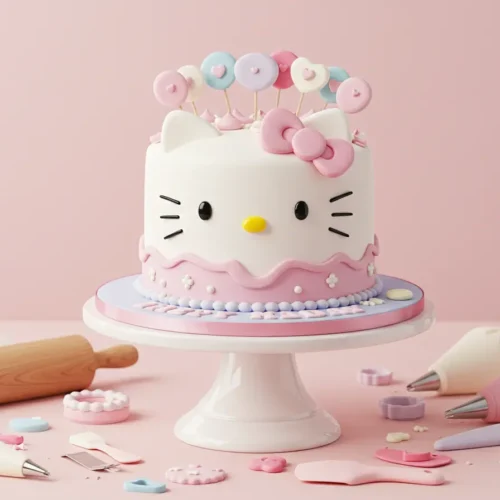
Now came the moment I had been waiting for: decorating! With my fondant rolled out to an even thickness, I cut out shapes for Hello Kitty’s features—her ears, eyes, and that adorable bow. As I worked with the fondant, I recalled watching countless YouTube tutorials on how to create these details.
It was surprisingly therapeutic to mold and shape each piece with my hands. The black fondant for her eyes contrasted beautifully against the white base of the cake. As I placed each feature onto the cake, it felt like bringing Hello Kitty to life right before my eyes.
The final touch was adding her signature pink bow on one side of her head. I remember stepping back for a moment to admire my work; it was incredible how these simple shapes transformed into something so recognizable and beloved. The joy of seeing Hello Kitty emerge from my creation was truly rewarding.
Adding the Final Touches
With Hello Kitty’s features in place, it was time for those final touches that would elevate my cake from good to spectacular. I decided to sprinkle edible glitter around the base of the cake for a bit of sparkle—after all, what’s a birthday without some bling? Additionally, I piped small rosettes around the edges using leftover pink buttercream frosting.
Each rosette felt like a little celebration in itself. I also took a moment to add some colorful sprinkles on top for an extra pop of color. As I stood back to admire my handiwork, I felt a sense of pride wash over me.
This wasn’t just any cake; it was a labor of love crafted for someone special. The anticipation of seeing my niece’s face light up when she saw it made all the effort worthwhile.
Tips for a Professional-Looking Hello Kitty Cake
Reflecting on my experience making this Hello Kitty cake, there are several tips I’d love to share for anyone looking to create their own masterpiece. First and foremost, patience is key—don’t rush through any step of the process. Allow your cakes to cool completely before frosting them; this will prevent any melting or sliding of your decorations.
Additionally, investing in quality ingredients can make a noticeable difference in taste and texture. Another tip is to practice working with fondant before you start decorating your cake. It can be tricky at first, but with some practice, you’ll find it easier to mold and shape into desired forms.
Lastly, don’t be afraid to get creative! Personal touches can make your cake unique and special. Whether it’s adding your own twist to Hello Kitty’s design or incorporating favorite colors or flavors, let your personality shine through.
Serving and Enjoying Your Masterpiece
Finally, after all that hard work, it was time to serve and enjoy my Hello Kitty cake! As we gathered around the table for my niece’s birthday party, I felt a mix of excitement and nervousness about how everyone would react. When it was time to cut into the cake, her eyes widened in delight as she saw her favorite character come to life in dessert form.
The joy on her face made every moment spent baking worth it. As we shared slices of cake among family and friends, laughter filled the room. Each bite was met with compliments about how delicious it tasted—my heart swelled with pride knowing that not only did it look good but it also tasted great!
In that moment, surrounded by loved ones enjoying something I had created with care, I realized that baking is not just about making food; it’s about creating memories that last a lifetime.
FAQs
What ingredients and tools do I need to make a Hello Kitty cake?
To make a Hello Kitty cake, you will need ingredients such as flour, sugar, eggs, butter, baking powder, vanilla extract, and milk for the cake batter. For the frosting, you will need powdered sugar, butter, vanilla extract, and food coloring. Additionally, you will need Hello Kitty-shaped cake pans, a mixer, spatula, piping bags, and decorating tips.
How do I prepare the cake batter and frosting for a Hello Kitty cake?
To prepare the cake batter, you will need to mix the dry ingredients together in one bowl and the wet ingredients in another, then combine the two mixtures until smooth. For the frosting, you will need to cream the butter and powdered sugar together, then add vanilla extract and food coloring as desired.
How do I shape and assemble the Hello Kitty cake?
After preparing the cake batter, pour it into the Hello Kitty-shaped cake pans and bake according to the recipe instructions. Once the cakes are baked and cooled, carefully remove them from the pans and trim any uneven edges. Then, stack and assemble the cakes with a layer of frosting in between.
How do I decorate the Hello Kitty cake with Hello Kitty features?
To decorate the Hello Kitty cake, you can use frosting to create Hello Kitty’s face, bow, and other features on the cake. You can also use fondant or edible markers to add details such as her eyes, nose, and whiskers.
What are the final touches to add to a Hello Kitty cake?
The final touches for a Hello Kitty cake may include adding any additional decorations such as sprinkles, edible glitter, or a personalized message. You can also add a border around the base of the cake for a polished look.
What are some tips for making a professional-looking Hello Kitty cake?
Some tips for making a professional-looking Hello Kitty cake include using a crumb coat of frosting before adding the final layer, using a piping bag and decorating tips for precise details, and taking your time to ensure each feature is well-executed.
How should I serve and enjoy my Hello Kitty cake?
Once your Hello Kitty cake is complete, you can serve and enjoy it at a birthday party, special event, or as a fun treat for Hello Kitty fans. Be sure to take plenty of pictures before cutting into your masterpiece!
For more delicious ideas, be sure to check out our other recipe articles on the website.