If you’ve ever ended up with a sunken cake, burnt edges, or a soggy middle, your cake pan might be the sneaky culprit behind the baking drama. The humble cake pan plays a bigger role in your sweet success than you might think. From its shape and size to the material it’s made from, every little detail can make or break your bake.
In this comprehensive guide, we’ll walk you through everything you need to know about cake pans—the different types, how to choose the right one, the best expert-recommended pans, and even how to troubleshoot common baking mishaps. Whether you’re a weekend baker or a full-on cake boss, this article is packed with tips, tricks, and tasty insights to help you master the art of baking with the perfect pan.
Let’s kick things off by understanding why the cake pan deserves way more credit than it usually gets.
What is a Cake Pan and Why It Matters
Understanding the Purpose of a Cake Pan
A cake pan is more than just a container to hold batter—it’s a baking essential that shapes, supports, and helps cook your cake evenly. It’s designed to withstand oven heat and promote even browning, so your cake comes out cooked through with a lovely golden crust. But that’s not all. The right cake pan affects rise, texture, and moisture retention. Who knew a metal dish could do so much?
However, not all pans are made equal. Some conduct heat better, others release cakes easier, and some can even alter the taste slightly—especially if they’re made from low-quality materials. Therefore, choosing the right baking pan becomes a critical step in ensuring consistent and delicious results.
The Role of a Cake Pan in Baking Success
Ever wondered why your friend’s cake recipe turned out fabulous for them but flopped for you? Yup, your pan might be the issue. The cake pan impacts how heat moves through the batter, which means your pan choice can lead to either a moist, fluffy cake or a dry, uneven one. Even a small change in pan size can mess with the baking time and end result.
On the other hand, when you use the right cake pan—especially one made of heavy-duty metal or nonstick aluminum—your chances of success go way up. Thus, understanding your pan is just as important as measuring your flour.
In short, it’s not just what’s in your batter, but what holds it, that truly counts.
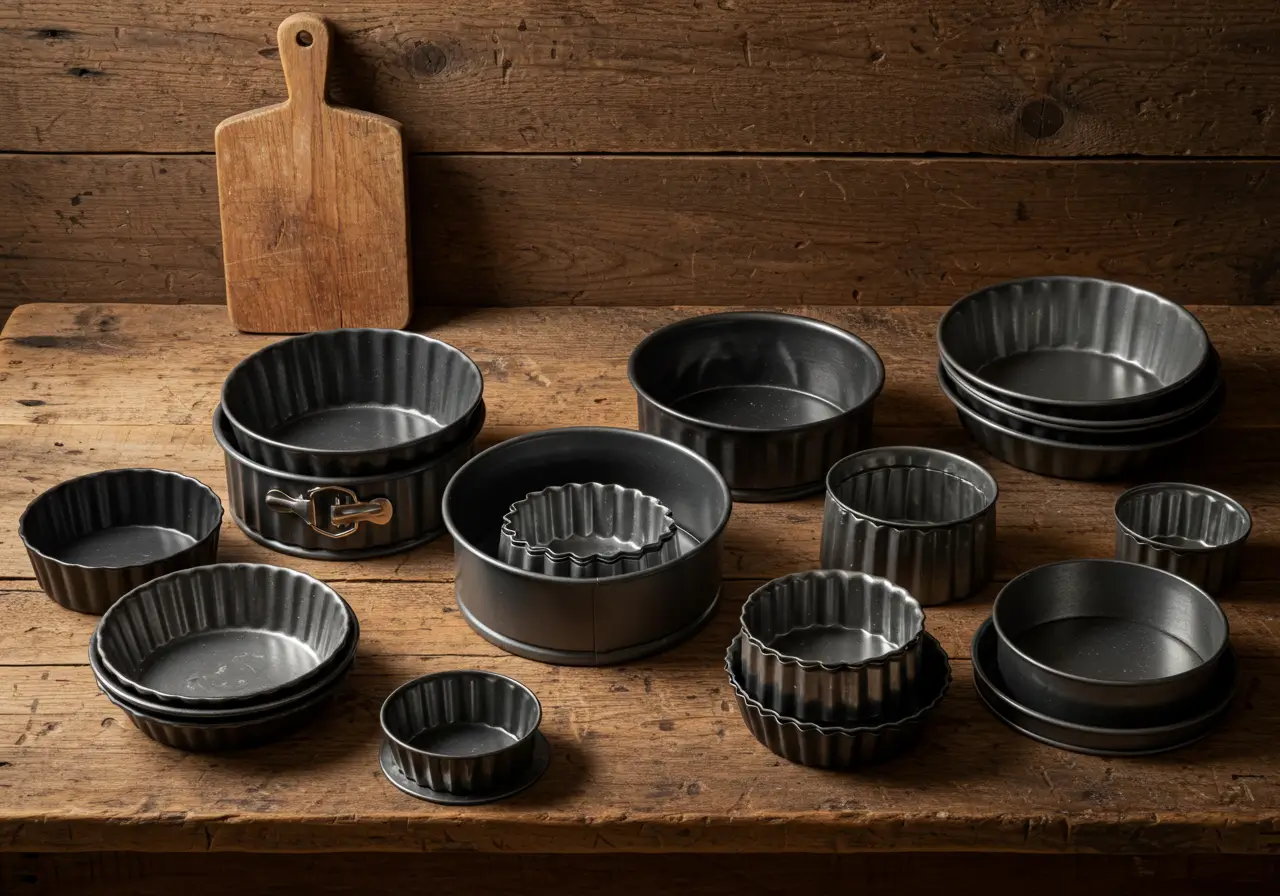
Types of Cake Pans Explained

Round, Square, and Rectangular Cake Pans
Most classic cake recipes call for a round cake pan—and there’s a good reason for that. Round pans allow heat to circulate evenly, which helps prevent dry edges. They’re perfect for layer cakes, birthday cakes, or even that trusty vanilla sponge you whip up on weekends.
However, square and rectangular pans have their perks too. They’re ideal for brownies, sheet cakes, and bar-type desserts. These pans make slicing super easy and uniform, which is a bonus for parties and potlucks.
In addition, you’ll often find that recipes specifically mention whether to use an 8-inch round or 9×13 rectangular baking pan, so size and shape really do matter. If you’re curious about adapting cake sizes or experimenting with different pan types, check out this helpful sheet cake size conversion guide from Promptly Recipes.
Bundt, Tube, and Springform Pans
Now, let’s talk about the stars of the specialty world. Bundt and tube pans create that iconic ring-shaped cake with a beautiful golden crust. However, they aren’t just pretty—they’re also practical. The central tube allows heat to reach the middle of the cake, which means more even baking.
On the other hand, springform pans are perfect for delicate desserts like cheesecakes or tortes. These pans have removable sides, making it easier to keep your dessert’s shape intact.
Thus, choosing the right style of cake pan isn’t just about aesthetics. It’s about baking smarter.
Specialty Cake Pans: Novelty, Silicone, and Mini Pans
Feeling creative? Novelty cake pans—like heart shapes, animals, or holiday themes—are a fun way to bring personality to your dessert. However, be sure to follow baking instructions closely. These oddly shaped pans can have hot spots or tricky corners where batter doesn’t cook evenly.
Silicone pans, while flexible and nonstick, can be tricky. They don’t conduct heat as well as metal, which might lead to uneven results. On the plus side, they’re super easy to clean.
Meanwhile, mini cake pans are perfect for individual servings or testing out recipes. They bake quickly, and their smaller size helps you avoid waste.
Therefore, stocking a few different types of cake pans will give you more versatility and better results across all your baking adventures.
How to Choose the Best Cake Pan
Material Matters: Aluminum, Steel, Glass, and Silicone
When it comes to cake pans, material makes a big difference. Aluminum is the go-to for many pros because it heats up quickly and evenly. It’s also lightweight and fairly durable.
On the other hand, stainless steel pans are sturdy but can sometimes heat unevenly unless they’re coated or layered with aluminum. Glass pans are another option, though they take longer to heat and can sometimes overbake your cake’s edges. Thus, you’ll often need to reduce the oven temperature slightly if using glass.
Then there’s silicone—great for nonstick ease, but not always ideal for traditional cakes. Since it doesn’t brown as nicely, some bakers prefer it for chilled desserts or novelty shapes instead.
In addition, choose pans labeled as oven-safe and food-grade to ensure safety and longevity.
Nonstick vs. Traditional Cake Pans
Nonstick cake pans make cake release a breeze, especially for delicate or sticky batters. However, the coating can wear off over time, especially if you’re using metal utensils or scrubbing hard.
Traditional metal pans might need a bit more greasing and lining with parchment paper, but they tend to last longer and brown your cake better. Therefore, weigh ease of use versus durability when making your pick.
Some expert bakers swear by anodized aluminum—it’s a non-reactive, nonstick-like surface that lasts forever and gives great baking results.
Choosing the Right Size for Your Recipe
Size really matters in baking. Using the wrong cake pan size can lead to overflowing batter or undercooked centers. Therefore, always match your recipe’s suggested pan size for the best results.
If you want to experiment with pan swaps, use a pan conversion chart to adjust baking times and batter amounts. For instance, if a recipe calls for two 9-inch rounds, you can often use one 9×13 pan instead.
On the other hand, deeper pans may need longer bake times, so keep an eye on your oven and test with a toothpick.
Best Cake Pans Recommended by Experts
Top Picks by Professional Bakers
Let’s be real—when expert bakers talk, we listen. According to industry pros, the best cake pans are sturdy, heavy-duty, and offer even heating. Brands like USA Pan, Nordic Ware, and Fat Daddio’s are often at the top of their lists.
These pans are usually made from anodized aluminum or feature a nonstick surface that releases cakes effortlessly. In addition, they resist warping, which is key when baking at high heat.
Thus, investing in just one or two high-quality pans can make a world of difference in your final bake. Don’t settle for flimsy dollar-store tins—they might just sabotage your recipe.
For more pro tips on baking gear, Promptly Recipes offers a full list of baking essentials worth checking out.
Best Budget, Mid-Range, and Premium Cake Pans
Not every baker needs a $40 pan—especially if you’re just starting out. For budget-friendly options, look for simple aluminum pans with straight sides. Wilton, for instance, offers good beginner pans at a low cost.
Mid-range pans often feature better materials and reinforced edges for extra strength. They’re perfect if you’re baking regularly but not quite at pro level.
However, if you’re baking weekly or want bakery-level results, spring for the premium ones. Heavy-gauge nonstick cake pans with even heat distribution save time, frustration, and cake disasters.
In conclusion, whether you’re buying your first cake pan or upgrading your collection, quality always pays off in the long run.
Ingredients in This Cake Pan Recipe
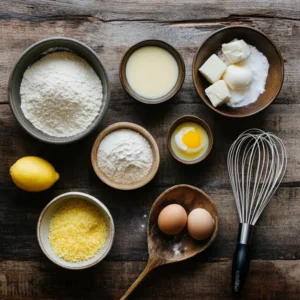
Basic Vanilla Cake (Perfect for Any Cake Pan)
Ingredients
- 1 ½ cups all-purpose flour
- 1 cup granulated sugar
- ½ cup unsalted butter softened
- 2 large eggs
- 1 tsp vanilla extract
- 1 ½ tsp baking powder
- ½ cup milk
- ¼ tsp salt
Instructions
- Preheat oven to 350°F (175°C). Grease and flour your cake pan or line with parchment.
- In a bowl, cream butter and sugar until fluffy.
- Add eggs and vanilla. Beat well.
- Combine dry ingredients. Slowly mix into wet batter.
- Stir in milk until smooth.
- Pour into prepared cake pan. Bake for 28–32 minutes or until a toothpick comes out clean.
- Cool for 15 minutes. Remove from pan and cool completely before frosting.
Notes
Common Ingredients for Cake Recipes
No matter what type of cake you’re baking, most recipes start with the same base ingredients. You’ll typically use all-purpose flour, granulated sugar, eggs, butter, baking powder, and milk or buttermilk. These ingredients create structure, sweetness, moisture, and flavor.
However, depending on the recipe, you might also see additions like vanilla extract, cocoa powder, sour cream, or lemon zest for that extra kick. Thus, even the most basic recipe can be turned into something special with a simple twist.
In addition, using room temperature ingredients helps everything mix evenly, which is especially important when baking in any type of cake pan.
Adjusting Ingredient Quantities for Different Pan Sizes
Got a recipe for an 8-inch pan but only have a 9×13? Don’t worry—it’s easy to adjust. Use a cake pan conversion chart to tweak the batter amounts and baking times. Generally, increasing the surface area means you’ll need less height but more watchful baking.
On the other hand, if you’re using a deeper pan, you may need to lower the oven temp slightly and bake for longer. The key is even heat, especially around the center.
For more delicious recipes and helpful baking tips, check out the Chocolate Cake Recipe for Beginners on Promptly Recipes—it’s perfect for trying out your new cake pan.
Cake Pan Preparation and Maintenance

How to Properly Grease and Line a Cake Pan
Before you pour in your batter, prepping your cake pan the right way makes all the difference. For most recipes, greasing the pan with butter or oil and then dusting it with flour works like a charm.
However, when dealing with sticky or delicate cakes—like cheesecakes or flourless options—parchment paper is your best friend. Cut it to size and place it at the bottom of the pan for easy removal.
Nonstick pans may not need as much grease, but it’s still wise to use a little, just in case. After all, no one wants half their cake left behind in the pan!
Cleaning and Storing Cake Pans for Longevity
To keep your cake pans in tip-top shape, wash them by hand with warm, soapy water. Avoid metal scrubbers that can scratch the surface, especially on nonstick pans. In addition, don’t soak aluminum pans for long periods, as this can cause warping or pitting.
Dry pans completely before storing them to prevent rust or discoloration. Stack carefully, especially if your pans have a delicate nonstick surface.
Thus, with a little care, even budget-friendly pans can last for years. Proper storage, regular cleaning, and gentle handling go a long way.
If you’re new to baking and want a full guide to prep and tools, the Beginner’s Baking Tools Checklist is a great place to start.
Cake Pan Substitutes and Baking Hacks
What to Use if You Don’t Have the Right Cake Pan
Ever found the perfect recipe only to realize you don’t own the right cake pan? We’ve all been there. But don’t sweat it—there are easy swaps. For example, if a recipe calls for a round 9-inch pan, you can use an 8×8 square pan instead. Just be mindful of thickness and adjust bake time slightly.
On the other hand, muffin tins can work great for mini cakes, especially if you’re short on time. Similarly, a loaf pan can be used for denser cakes like pound cake—though you’ll likely need to extend baking time.
Therefore, knowing how to convert pan sizes and adjust accordingly keeps you flexible in the kitchen.
How to Convert Recipes for Different Pan Shapes
Converting pan shapes is more art than science, but there are a few tricks. Keep the batter height the same when swapping pans. That way, your cake cooks evenly, regardless of the shape.
If your new pan has a larger surface area, reduce the baking time slightly. Conversely, if the pan is deeper, bake longer at a slightly lower temperature to prevent burning the edges while the center cooks through.
In addition, you can always test doneness with a toothpick—poke it in the center, and if it comes out clean, your cake’s ready.
Common Mistakes When Using a Cake Pan
Overfilling the Cake Pan
One of the most common mistakes in baking? Pouring in too much batter. It’s tempting to fill your cake pan to the top, especially when you want a tall, fluffy cake. However, this often leads to overflowing in the oven, which creates a mess and uneven baking.
As a general rule, only fill your cake pan about two-thirds full. This gives the batter space to rise without spilling over. In addition, if you’ve got extra batter, don’t force it all into one pan—just bake a small tester cake in a cupcake tin instead.
Therefore, understanding how much batter your pan can hold is key to getting good results and a neat oven.
Not Adjusting for Pan Material or Size
Another common issue? Not adjusting bake time or temperature based on the type of cake pan you’re using. Dark-colored pans absorb more heat, which can cause cakes to brown too quickly. In that case, it helps to lower the oven temperature by 25°F.
In addition, if you switch pan sizes, you need to tweak things. A deeper pan needs a longer bake time, while a wider, shallower one will cook faster. Failing to adjust can leave you with raw centers or burnt edges.
Thus, always double-check your recipe and pan size before starting. A few extra seconds of prep can save your whole cake.
FAQs – Cake Pan Questions Answered
Can I use a glass dish instead of a cake pan?
Yes, you can—but with caution. Glass takes longer to heat, so your cake may cook unevenly. However, once hot, it holds heat well, which could lead to overbaking if you’re not careful.
Therefore, if you use a glass dish instead of a metal cake pan, reduce the oven temperature by 25°F and check for doneness early. On the other hand, glass is great for pies or cobblers, but not always ideal for tall cakes.
How do I stop my cake from sticking to the pan?
There’s nothing worse than baking a beautiful cake—only to have half of it cling to the pan. To avoid this, always grease your cake pan well. Use butter, shortening, or baking spray. Then dust with flour or use parchment paper.
In addition, nonstick pans can help, but even they need a bit of prep. Also, letting your cake cool for 10–15 minutes before turning it out helps release it cleanly.
What’s the best cake pan for beginners?
For new bakers, a basic 9-inch round cake pan is a smart pick. It’s the most common size in recipes and easy to work with. Choose one made of anodized aluminum for even baking.
If you’re just starting out, avoid overly fancy pans or silicone until you’re more comfortable. Simple pans make it easier to focus on the batter and technique first.
Conclusion and Final Tips
Wrapping It Up: Why Choosing the Right Cake Pan Matters
By now, it’s clear that the humble cake pan plays a bigger role than most people think. From baking even layers to shaping your final presentation, it can make or break your dessert. Therefore, investing in a few quality pans and understanding how to use them well will instantly boost your baking game.
On the other hand, even the best cake pan won’t fix poor technique. So, it’s just as important to learn how to prep, fill, and care for your pans properly. Whether you’re baking for a birthday, holiday, or just because—you want the final result to come out clean, level, and ready to decorate.
Quick Tips for Better Results Every Time
- Stick to the two-thirds rule when filling your cake pan—this helps prevent overflow.
- Use the right prep method for your recipe—greasing, flouring, or lining as needed.
- Adjust baking times when swapping pans, especially with different materials or shapes.
- Cool cakes in the pan for 10-15 minutes, then transfer to a wire rack to finish cooling.
In addition, don’t be afraid to experiment. Try different pans, tweak your recipes, and most of all—enjoy the process. With the right tools and a little practice, you’ll be baking like a pro in no time.
For more delicious ideas, be sure to check out our other recipe articles on the website.